


Creating realistic functioning hands and picking up specific objects can be a tricky thing in VR, since you want to make it look like you’re really holding that object. I’ll go over the animation Blueprint we use in Confined Space VR, directly below is a video for context.
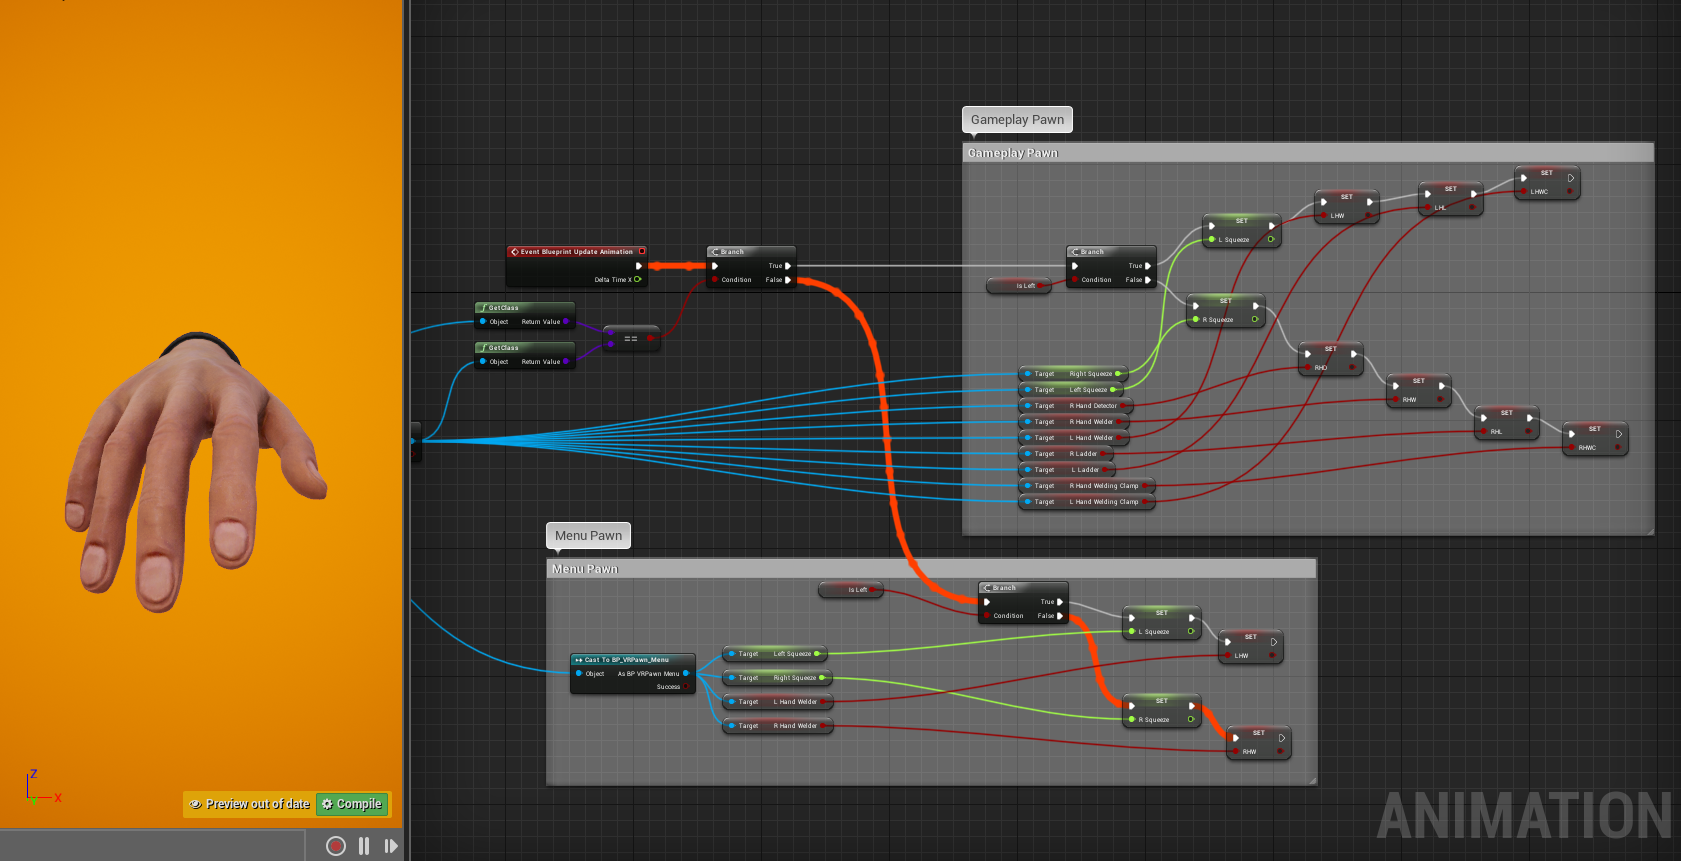
First we get all of our variables from our pawn. In this implementation we are using the same Animation Blueprint for both the gameplay pawn and the menu pawn, so for optimization purposes we determine which pawn the Anim BP is being used by, which is the first branch. To further optimize, we also made an IsLeft variable so the left hand can use a Child Anim BP that simply has the IsLeft variable set to true by default.
Ignore the current flow of the execution pin for now. For the following example we will talk about the Right Hand in the Gamplay Pawn. So we would go True on the first Branch for Gameplay Pawn, False on the second Branch since it’s the Right Hand, and setting the R Squeeze from the R Motion Controller Trigger, then checking to see if we are holding various objects for which we have states that we will go over later.
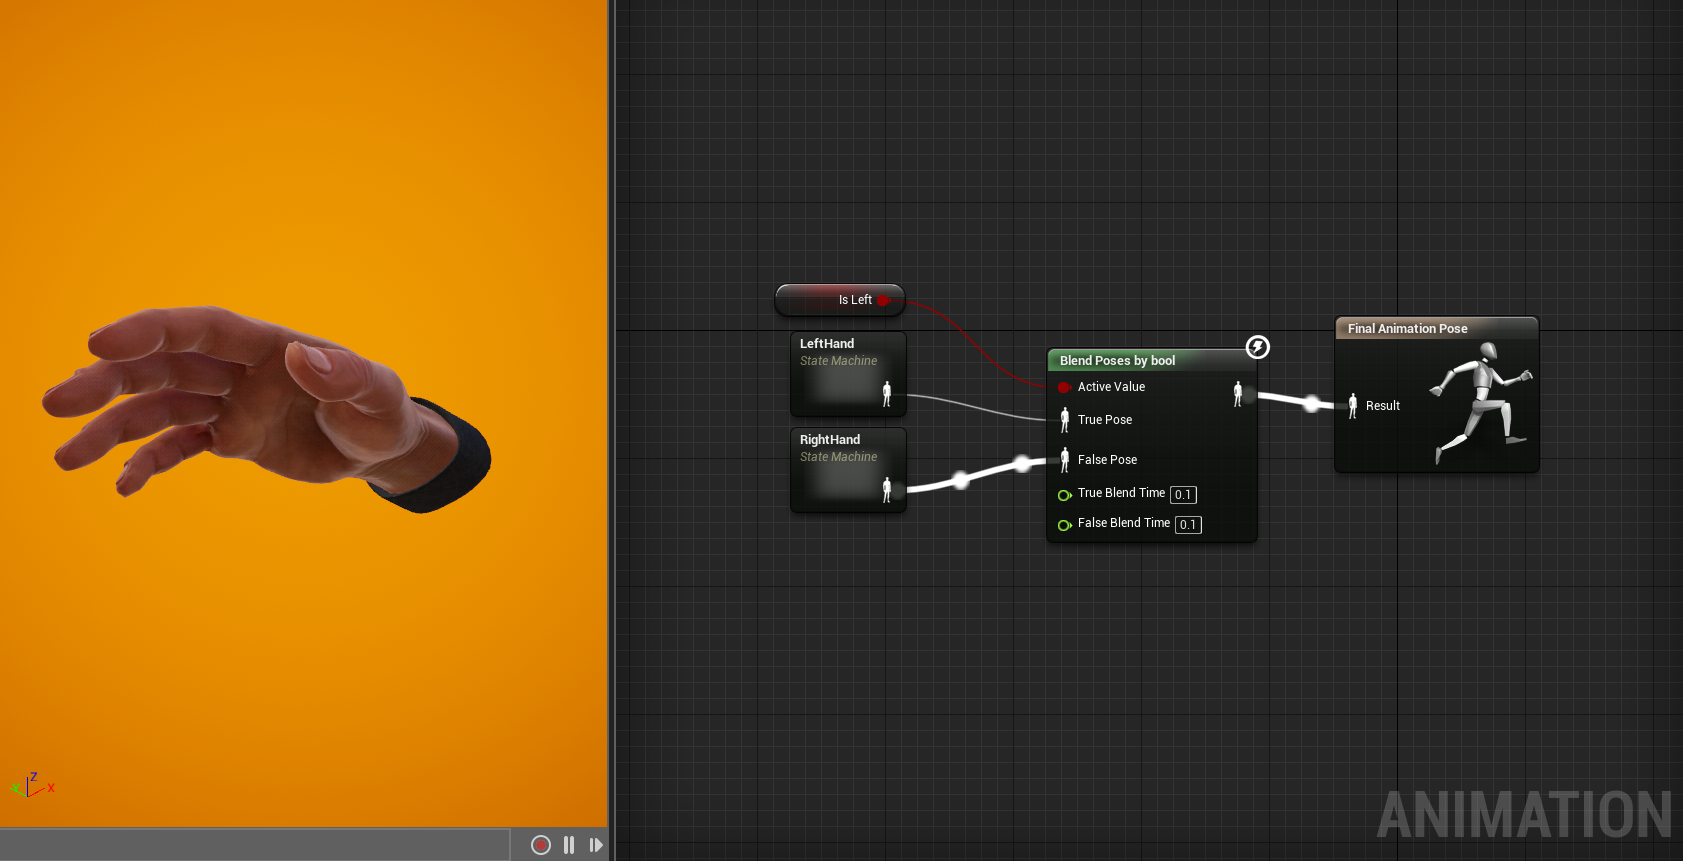
Next we hop over to the Animation Graph. Again we see our IsLeft bool making sure we stay optimized, and only evaluating the portion of our Anim BP that we need for each specific hand. Here we have two State Machines connected to the Blend by Bool node. Since it appears this is the Anim BP for the Right Hand we’ll go into the State Machine next.
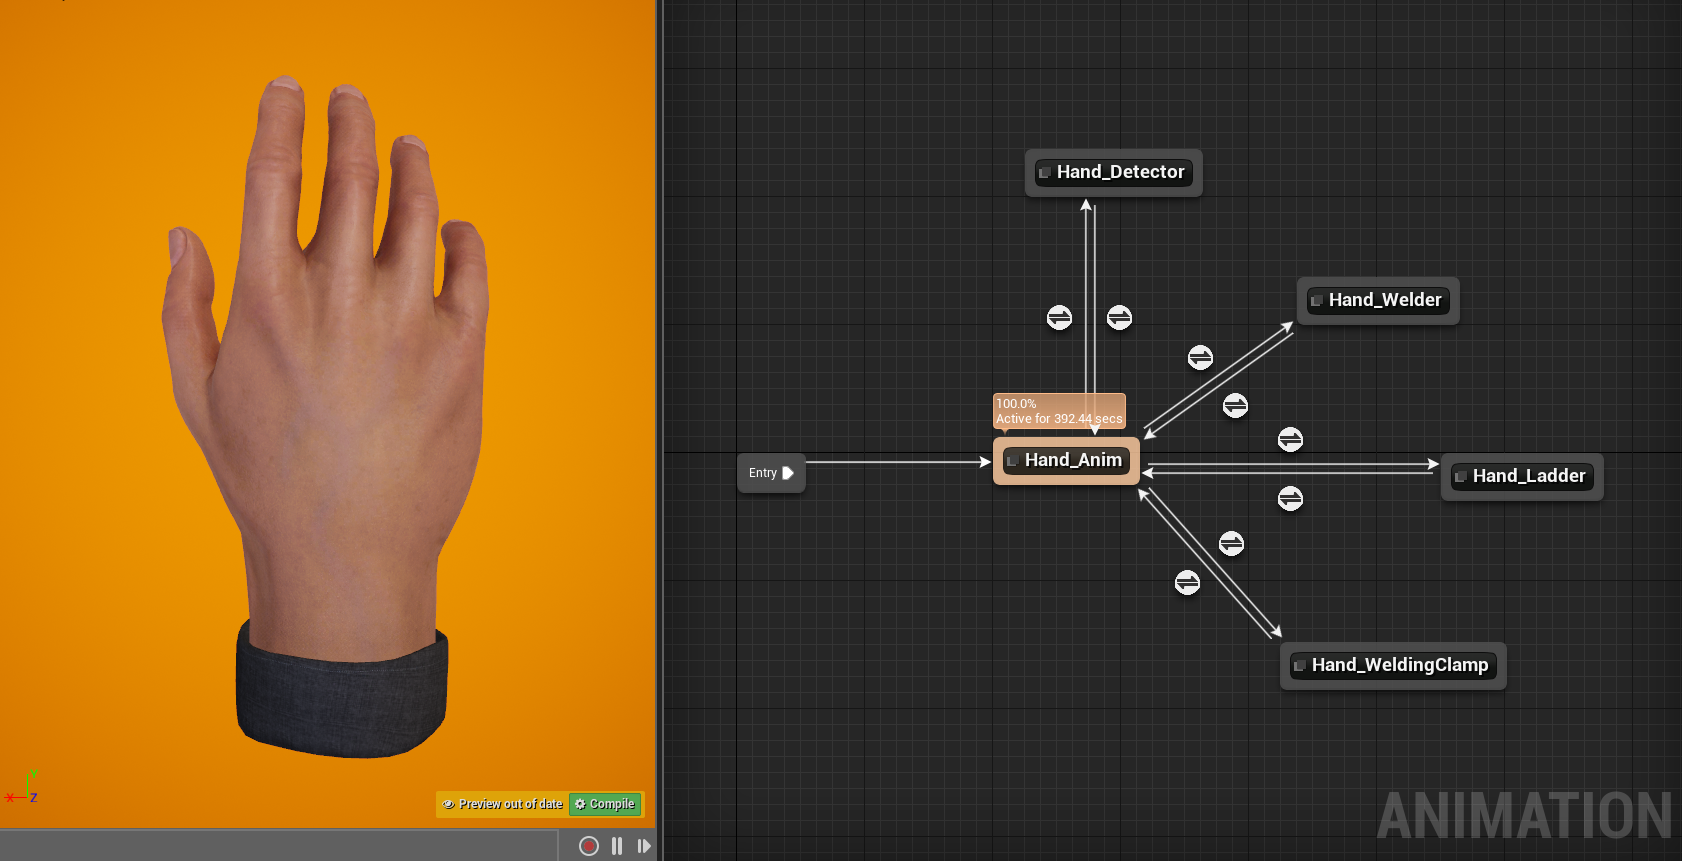
In the Right Hand State Machine we have all the states our hand could be in. In our Confined Space VR build we have an instance of specific things that the hands are holding; the detector can only be held by the Right Hand and the probe(not pictured) can only be held by the Left Hand.
If your hands both did the exact same thing you may not need an IsLeft and break them into two different State Machines. You could also achieve similar results with specific bools. There are usually several ways to achieve the same result.
For this example we’ll dive further into the Welding Clamp. The Detector, Welder, and Ladder are all single frame poses, blending over .3 seconds on or off, but the Welding Clamp is slightly more interesting. We’ll look at that next
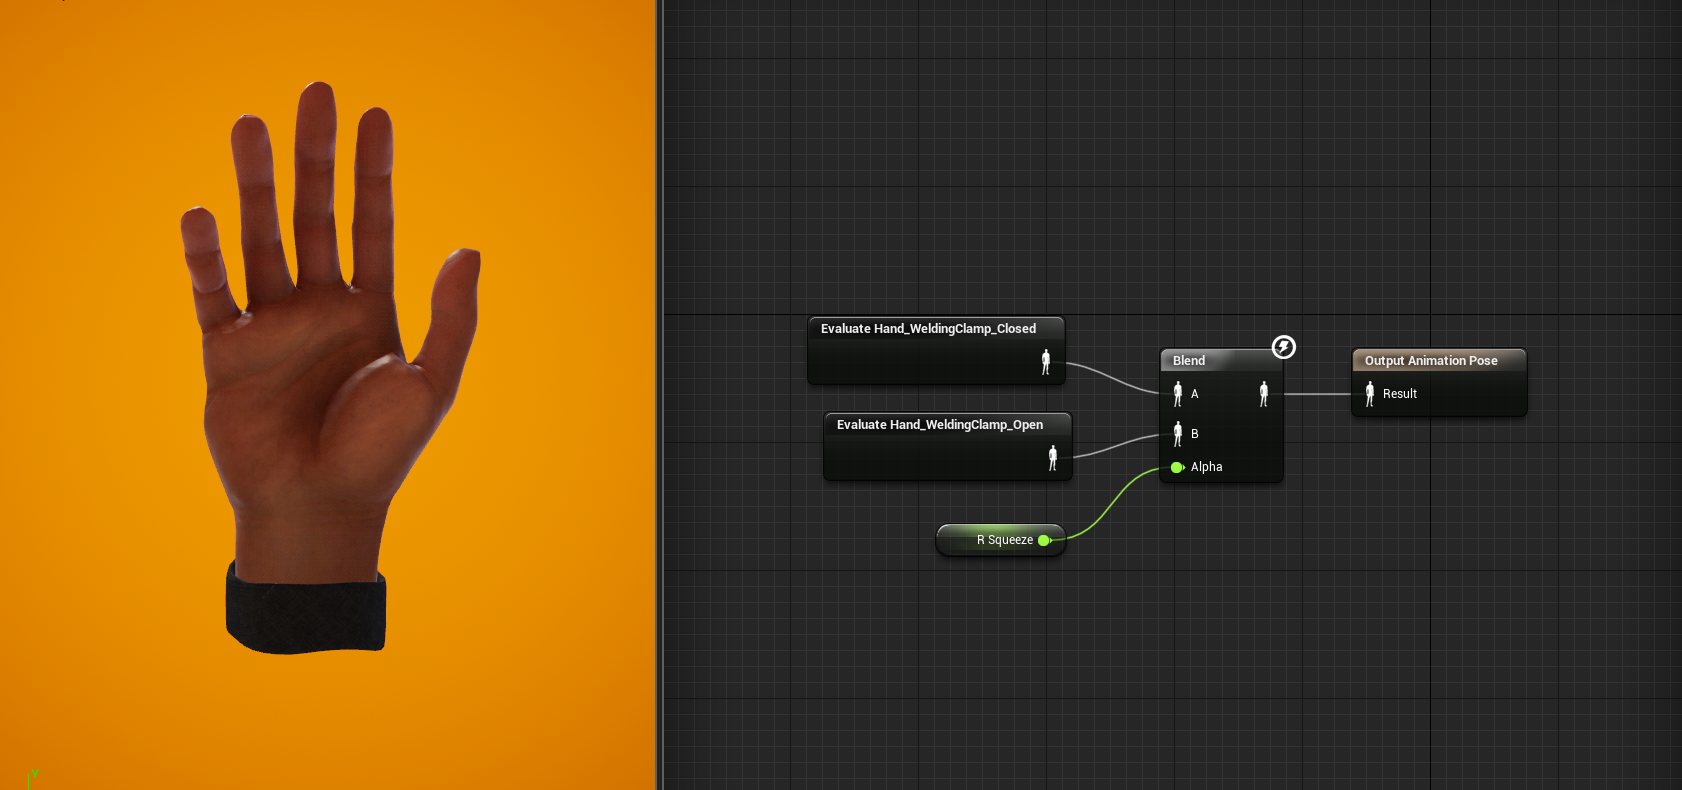
So to get to this point, we established we are using the Right Hand(IsLeft is false), we got are stored variables for the current hand pose needed for the right hand, we want to evaluate the Right Hand State and we attempted to pick up the Welding Clamp and now have it attached to our hand on a mesh socket.
R Squeeze is getting the pressure of the Motion Controller Trigger and is blending between two Single Frame Animation Poses; Open and Closed.
Sometimes Motion Controllers can spit out noisey axis values for anything between 0 and 1 so blending between two poses can look like you’re twitching. To fix this use a “Nearly Equal” node in your pawn when you’re getting your Motion Controller Trigger value, I used a value of .04; higher values than that can create a stylized stop motion/step frame look. You can further smooth out your grip motion by using a Float Interp To node with .3 for your Delta Time and Interp Speed.
We usually create all of our own custom assets but used a sourced asset for the hands this time. Thanks to 3DMaesen, an artist on Sketchfab, for providing the model. I then rigged them for animation and also created a subsurface material in Unreal Engine. The project has recently also been converted to Unreal 4.22 and looking at taking advantage of some of the new animation features to further push the realism.
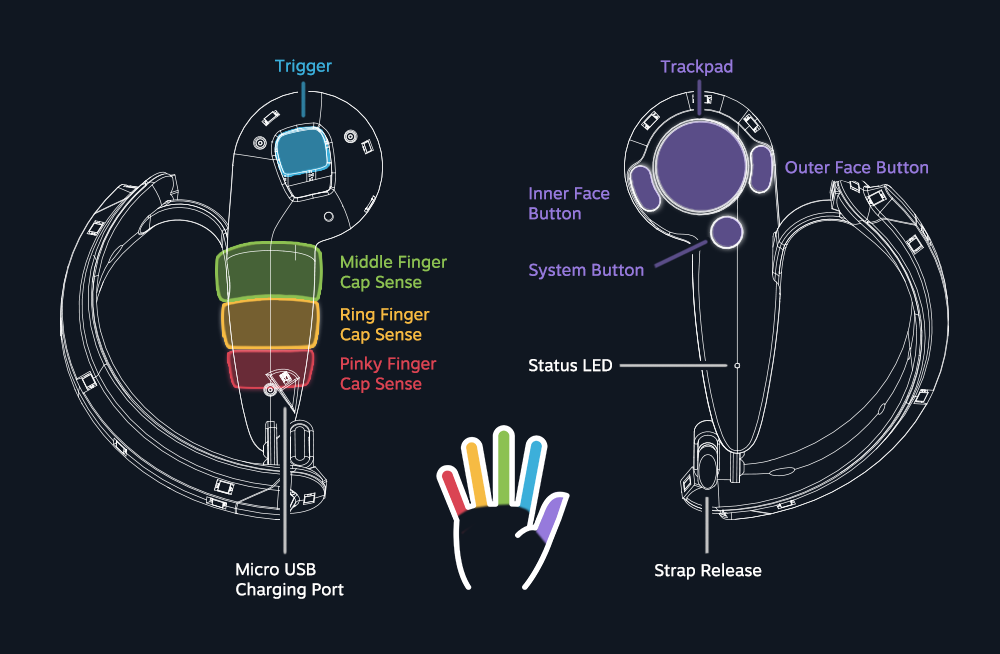
Lastly, we use Valve’s Knuckles controllers for all of our experiences now, and plan on implementing full finger tracking once there is full support for them in Unreal. Check back soon for a post on that!
Sign up below to receive email updates when we post new content.